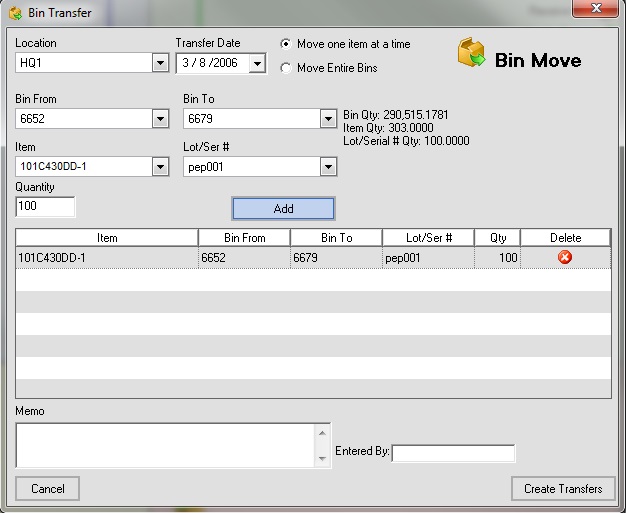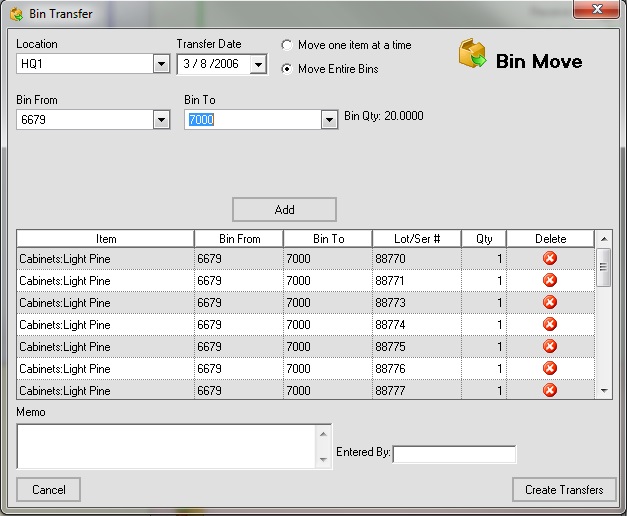
In version 6.1.58, there in a new feature to move inventory from one bin to another, called New Bin Move, located in the Warehouse menu. Enter the location and the date of the transfer. Next, there are 2 ways to move your bin quantities:

Move one item at a time: This selection will allow you to move a specific item and quantity. First, select the Bin From and Bin To, and select one item, lot/serial #s, and enter the Qty to transfer. Note, when you select your From Bin, the total quantity in the bin (of all items) is listed. Once you have selected the item, the total quantity for the item in the bin is listed. Use that to determine the quantity that you will transfer.
Click Add and your entry will be listed below. Continue for multiple items.

Move Entire Bins: This will move all items and quantities from one bin to another. Select the bin you will transfer from and the bin you will transfer to. The total inventory count being transferred is the Bin Qty. Click Add, and it will list all of the items selected from bin From, Bins From and To, the Lot /Serials #s and the Quantity.
You may also, delete the line items that you do not want listed by clicking the red X on the line item.
Finally, click Create Transfers, and a new Quantity Adjustment (Adjust Inventory) screen will open. The items are listed with a quantity of 0. Remember, that no quantity is adjusted, just moved from one bin to another. Therefore, you will also see the box checked to “Only adjust in NumberCruncher.”